


How to Change A Belt On A Can-Am Commander-10 Easy Steps

Can-Am Commanders are one of the most popular side-by-side UTVs in the market as their excellent performance, reliability, and durability. However, regular maintenance is essential to keep your Can-Am Commander running smoothly and efficiently.
One of the most critical components that need attention is the drive belt. After long-term use, it will be worn down and broken, which results in lower performance or even leaves you stranded in the middle of nowhere. So it’s significant to know how to change a belt on your Can-Am Commander. This can save time without waiting for help for long hours.
In this blog post, we will present you with easy steps on how to change a belt on a Can-Am Commander. No matter who you’re, a seasoned mechanic or a UTV enthusiast, you will change your belt quickly like a pro after reading this blog.
Explore now!
Tools You'll Need
Before starting the installation steps, please prepare the following tools:
- Ratchet
- 10mm socket
- 8mm socket with an extension
- Torx T30 bit
- Flathead screwdriver
- New Can-Am Commander drive belt

10 Steps On Changing A Belt On A Can-Am Commander
Be cautious about the engine and exhaust and let the machine cool down before working on it! Before changing the belt on your Can-am commander, remove the seat.
Step 1: Find The Clutch Cover
First, locate the Can-Am Commander clutch cover. It's situated on the driver's side of the vehicle, towards the rear wheel. Once you saw it, use the ratchet and 8mm socket to remove the bolts securing the plastic outer cover. Remove the cover and set it aside.
Step 2: Loosen the Secondary Clutch Bolt
Next, loosen the secondary clutch bolt with the 18mm socket. The bolt is located in the center of the secondary clutch assembly. Don't remove the bolt entirely. To loosen the clutch bolt, you will get enough space to work with the belt.
Step 3: Remove the Belt
With the secondary clutch bolt loosened, you can now remove the old belt. To do this, push the secondary clutch toward the engine until it bottoms out. This action will create slack in the belt. Use your hands or a flathead screwdriver to pry the belt off the clutches. Be careful not to damage the clutch sheaves while doing so.
Step 4: Inspect the Clutches
Before installing the new belt, inspect the clutch sheaves for any signs of damage or wear. If you discover grooves, rough spots, and other irregularities on the sheave surfaces, it's essential to solve these issues before installing the new belt. If you find gouges or cuts, you'll need to replace your clutch.
Step 5: Clean the Clutch Sheaves
To achieve optimal results and belt life span, clean the clutch sheaves using a clean cloth. Remove dirt, debris, or grease buildup from the surfaces. You can also use a mild cleaning solution if necessary, but make sure to dry the sheaves and all the components entirely before installing your new belt.
Step 6: Install the New Belt
Now that the clutches are clean and ready, it's time to install the new belt. With the secondary clutch still pushed towards the engine, loop the belt around both the primary and secondary clutches. Ensure the belt is placed properly in the grooves and centered on the sheaves.
Step 7: Re-tighten the Secondary Clutch Bolt
After ensuring the belt is correctly installed, use the 18mm socket to re-tighten the secondary clutch bolt. Make sure the bolt is tightened securely, as this will help maintain proper belt tension.
Step 8: Rotate the Clutches
Once the secondary clutch bolt is tightened, rotate the clutches by hand to ensure the belt is evenly distributed and seated correctly. If you notice any places where the belt seems to be pinched or misaligned, carefully adjust it as needed.
Step 9: Reinstall the Clutch Cover
With the new belt installed and properly seated, you can now reinstall the clutch cover. Use the ratchet and 10mm socket to secure the cover with the bolts you removed earlier. Make sure the cover is securely fastened to prevent dust and debris from entering the clutch assembly.
Step 10: Test Your Can-Am Commander
Finally, start your Can-Am Commander and take it for a short test drive. Listen for any unusual sounds and pay close attention to how your vehicle performs. If everything feels smooth and operates as expected, congratulations—you've successfully changed your belt!
Conclusion
Till now, you’ve learned that changing a belt on your Can-Am Commander is a relatively simple process that can save you time and money in the long run. Regular belt maintenance will ensure your UTV continues to run at its best while reducing the risk of unexpected breakdowns.
So, follow this step-by-step guide whenever needed, you'll tackle this task with confidence, and your Can-Am Commander will be ready for many more miles of adventure.
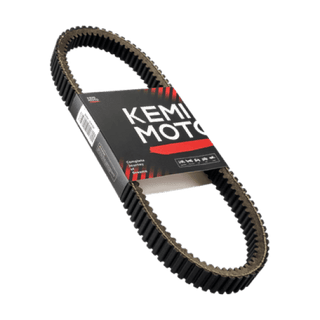
If you own a Kemimoto Can-Am Commander drive belt, don't forget to consult our manual for any additional information or specifications specific to your model. Or, do not hesitate to phone us at +1 408-429-4149. We are always here to help!
FAQs
1. Why Kemimoto drive belt for Can-Am Commander?

Made of layers of durable material including chloroprene rubber and nylon, our durable CVT drive belt performs excellently in high temperatures and extreme conditions after hundreds of experiments.
With a powerful bite on its surface, the Kemimoto drive belt for Can-Am Commander can prevent your Comaander from skidding on rough terrain. Besides, it contributes to smooth acceleration which extends the belt service life.
Ideally, replace the belt according to the above steps every 50 hours or 1000 miles to maintain your machine, you will get a powerful Can-Am Commander for adventures. Our drive belt with excellent quality at a reasonable price of around 60 dollars. So, don’t change the drive belt too late because it cost you thousands of dollars in fixing damaged parts caused by the belts.
2. How do you tell if a Can-Am Comamder belt is bad?
Your drive belt is probably bad and needs to be swapped if you find the signs as follows:
1). There are visible cracks, fraying, and damage on the belt.
2). There are missing teeth or cogs on the inner portion of the belt. Missing teeth and cogs will affect the proper ability of the clutch system.
3). A glazing or shine on the belt signifies that it has become too hot and might not provide sufficient grip.
4). Uneven or excessive wear on the belt.
5). A slipping belt should be changed. If you notice the engine RPM increasing disproportionately to the Can-am Commander speed, it might be a sign of a slipping belt.
6). Any squeaking, chirping, or other abnormal noises coming from the clutch area could indicate a worn-out belt.
7). A worn or damaged belt can result in decreased performance and sluggish acceleration in your Can-Am Commander.
8). If the belt is narrower than the manufacturer's recommended minimum width (found in your owner's manual), it needs replacement.
3. How often should you change a Can-Am Commander belt?
The recommended interval for changing a Can-Am Commander belt depends on factors such as riding style, terrain, and the specific model.
But, a general rule of thumb is to inspect your belt every 50 hours or 1000 miles of usage. Or, you can consult our manual for the guidelines and recommendations for your specific model.
When you notice any signs of wear, damage, or slippage during regular inspections, you should replace the belt sooner.
4. How do you break in a new belt on a Can-Am Commander?
1). Install the new belt correctly as per the above steps and owner's manual or service manual instructions.
2). Take it easy for the 1st 5 miles, by then it will warm up. Or, start the engine and let it idle for a few minutes to warm up the belt. Have the trans in LOW and the belt will travel through the entire plate of the clutch.
3). Engage the transmission and take the vehicle for a gentle test drive at low speeds (less than 30 mph or 50 km/h), avoiding aggressive acceleration and hard braking for the first 20-30 miles (30-50 kilometers).
4). Perform several moderate accelerations and decelerations to help seat the belt properly.
5). Allow the belt to cool down by stopping the vehicle and letting the engine idle for a few minutes.
6). Repeat steps 3 to 5 for a total of around 100 miles (160 kilometers) of gentle driving during the break-in period.


Leave a comment